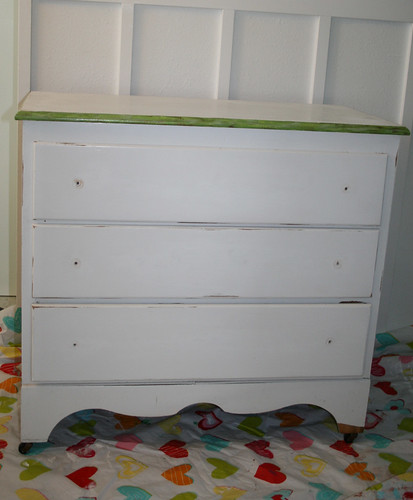
Unfortunately, the only "before" picture I took was partway into the refinishing. It orginally had some very lovely 90's faux painted florals on each of the drawers. They were some sort of sticker, and a huge pain to sand off! So this picture is after sanding, and before priming...
 |
| After sanding, before priming |
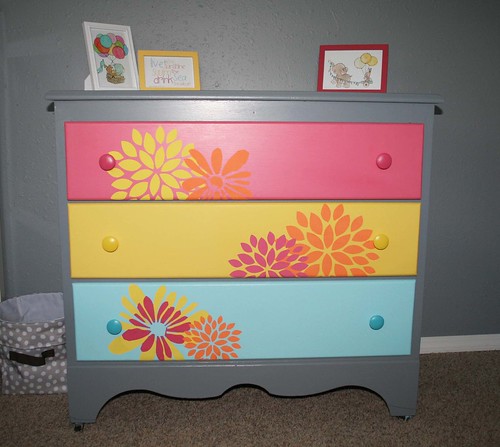
I used the Sunshine prints I made as my color inspiration for the dresser. I was able to use all paints that I already had, so this dresser make-over was pretty much free. I did have to buy new knobs. :) I painted the frame part of the dresser a medium grey, and then painted each drawer a color to match the prints--pink, yellow, and aqua. I used my Silhouette cutting machine to import some of the flower graphics I had used for the prints, and turned them into cut files. I then cut them out of vinyl, and used them as stencils to paint on the flowers on each drawer. I used acrylic paints because of their quick dry time. It was a bit time consuming and tedious, but the end result was definitely worth it. I have a unique, custom piece for my baby girl!
 |
| Finished dresser! |
 |
| Side detail
Linking up to these great parties!
|


very cute! I think the fact that the dresser shell and wall match is a really great idea. It showcases the paintings on the front very nicely! :)
ReplyDeleteSuch a sweet piece for a little girl!
ReplyDeletehttp://freshpaintabq.blogspot.com
Oh my gosh, this looks sooo fantastic! Wow! What a redo! I love the colors, I love the flowers...fabulous! Would you pretty pretty please consider sharing it here?
ReplyDeletehttp://oneartmama.blogspot.com/2012/07/shine-on-fridays-36-and-giveaway.html
Gorgeous... love the colors :)
ReplyDelete-Tanya
http://tanyaanurag.blogspot.in/
Great refashion! So cute! I would love for you to link this up to The CSI project this week. The challenge is refashions/upcycles. This would be perfect and you just might WIN! Come on over each week for a new challenge, new tutorials and new judges.
ReplyDeletewww.thecsiproject.com