First, I just have to share a pic of who I spent most of my day with.
This is my newest nephew, Kaleb. He and his brother Kenan came to play at our house today so their parents could take their great-grandma to the airport in Sioux Falls. And I loved every minute of it! He is three weeks old, and an absolute doll! It really made me realize that Jackson (17 months) is really not a baby anymore. :( And since Jackson is our last, I soaked up every second of having Kaleb here! I did manage to sneak in one small project though!
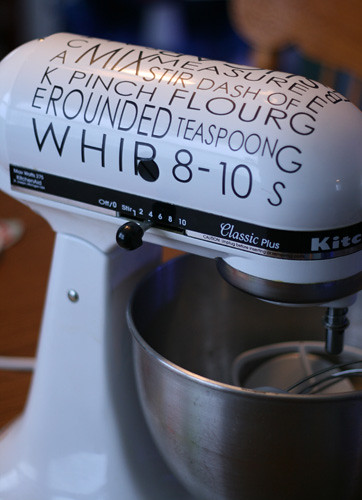
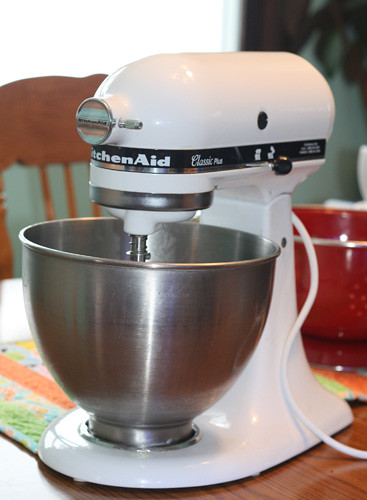
Over the weekend I was bloghopping and came across this post, and was immedietly smitten. Why had it never occured to me to vamp up my Kitchenaid mixer? It's my cooking BFF. My dad got it for me for Christmas years ago, and I seriously don't know how I could live without it!
So I attempted to download the files she was kind enough to offer up, but found out that my Silhouette doesn't take SVG files, and that tracing a JPG would be a much more difficult process than just doing it myself. So I spent a few minutes in Silhouette Studio (have I said how much I love the software?! It is soo easy to use!), then I cut out the design, and began weeding...which is the part I hate most and the part that takes the most time.
So, you wanna see the before and after? Of course you do! Everyone loves a good before and after right?!
Before:
After:
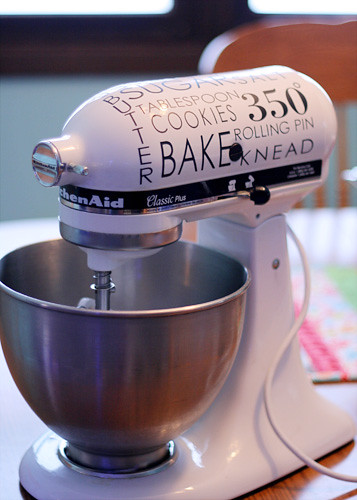
Don't you love it! I do!! And the best part is, it's vinyl, so if I can easily change it out if I get tired of the subway art look!
Happy Monday!
Linking up to the Crafty Cutter party at Serenity Now
Monday, January 31, 2011
Saturday, January 29, 2011
Coffee table makeover
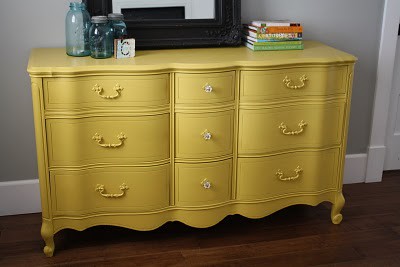
This came out so much better than I even imagined. Last week one day I was asked by a Facebook friend for some ideas on a blank wall in her house. For some reason, I immediately thought of the yellow sideboard/dresser at The Pleated Poppy:
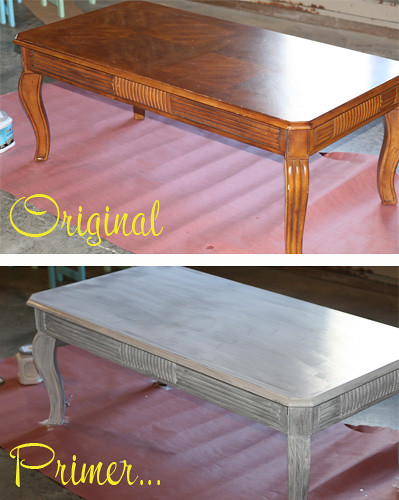
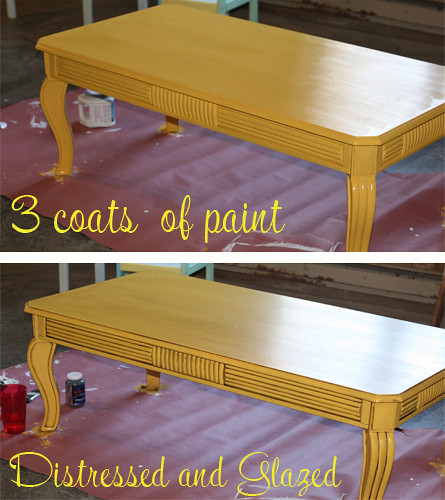
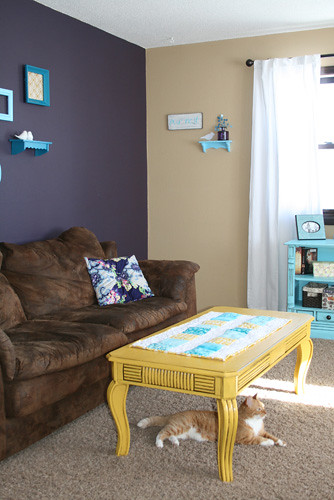
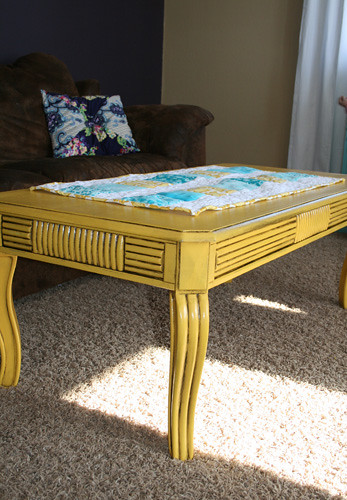
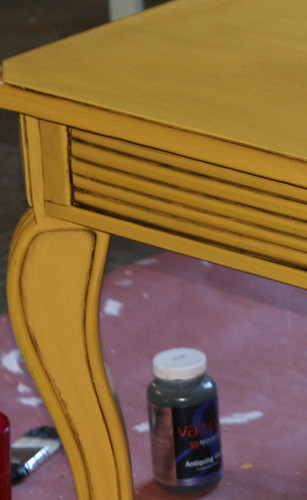
And then once I pulled it up again, I couldn't get the color out of my head...and I also realized that I have a dresser VERY similar sitting in the girls' room! So I decided I NEEDED mustard yellow paint. Then I remembered that we also had a matching coffee table to our end tables downstairs, and suddenly it hit me that mustard yellow would look great in the living room w/ the aqua and purple. The next day I drove to town, and picked up some paint (the color is Sunflower by Colorplace, but I had it color matched to Dutchboy dimensions), and set to work. I started with the coffee table b/c it was easier, and lighter. :) And I'm so glad I did! It adds so much to the living room, and I all around just love it! I snapped a few pics to show you the process.
In place in the living room: (I know the pics aren't the best--the morning light wasn't working with me, and I was too busy to retake them...)
I luuurve how much glazing adds to a piece.
I even made a new runner for it already! :) More on that tomorrow or Monday!
Happy Weekend everyone!
Linking this up to the Weekend wrap up at Tatortots and Jello
Thursday, January 27, 2011
Painting...
I've been painting my arms off the past couple of days; a coffee table, 4 doorways of trim, and numerous other spray painting projects (I'm always spray painting something--it's a miracle cure for just about anything!)
First I'll give you a little teaser of my coffee table makeover...
It's coming along beautifully! I should have a whole post about it tomorrow sometime!
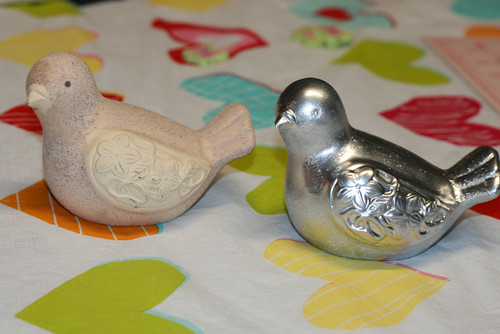
Secondly I wanted to show off some little crafty things..first the difference spray paint can make. I took 2 little birdies from Dollar Tree, and sprayed them--the original is the sand colored...and with a little Matte Aluminum spray paint, voila!
These will be moving upstairs and hopefully showcased on my new coffee table soon! :)
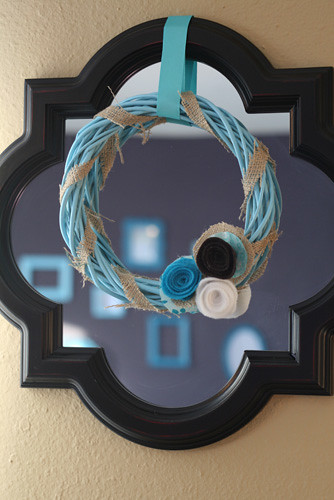
While at Dollar Tree, I also grabbed a couple of small wreaths. With a little spray paint, burlap and felt, I turned it into this little beauty..
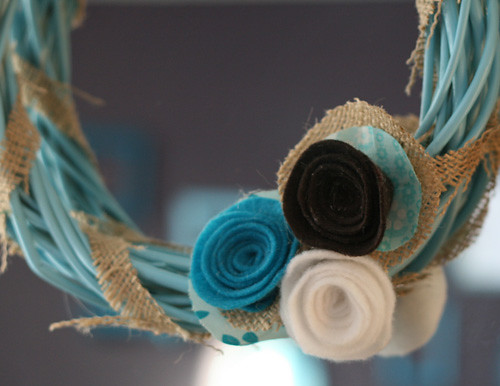
Close-up on the flowers:
These little flowers were so cute and easy to make! I might put up a mini-tut for them in the next day or so!
So that's what I've been up to today!
Happy Thursday!
Tuesday, January 25, 2011
I (heart) my Silhouette!
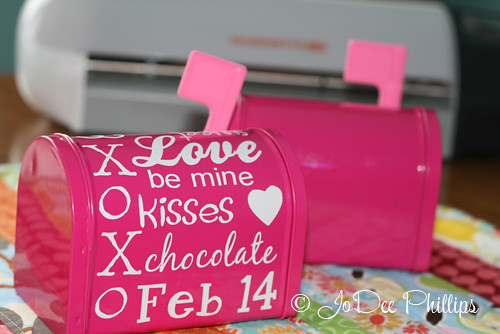
I recently purchased a Silhouette SD cutting machine with my Christmas money, and I have fallen in love. This machine is amazing! If you don't have one, you need one! Especially if you love crafting. Last night I was playing around with it, and decided to spruce up these cute little mailboxes I got from Target in the $1 section. I love how cute they are now!
Here's a pic showing my version and the original side by side. And my new lover in the background. ;)
My boys :)
These are my two little men--Braydon, 7, and Jackson, 17 months. This photo was taken last summer of the two of them, and I just love it.
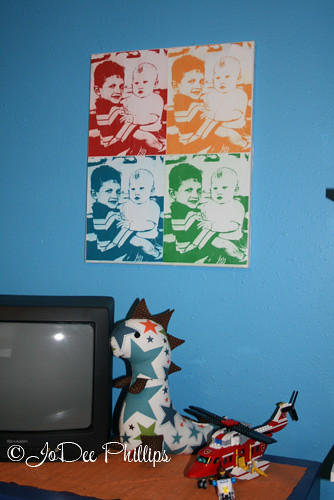
The boys' room is pretty plain as far as decorating. I let Braydon pick the paint color when we moved in, so it's a pretty neptune blue. He has a couple faux street signs from Hobby Lobby on the walls, but that's about it. So I decided to try and make some artwork to hang on the wall.
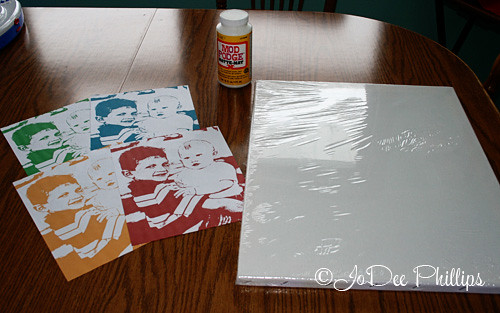
I used Photoshop to tweak the above image, and then printed out 4 copies. Then I grabbed some mod podge and a canvas I had laying around.
An hour or so later, I ended up with this:
It's not perfect--the red image is really wrinkled, but Braydon loves it! I didn't have any cardstock when I printed them, so I may reprint on cardstock and try it again...b/c the wrinkles bug me, even if they don't bug him! haha! Or maybe I'll splurge and order a real canvas from an online photo place..I can't really decide yet. But I do really like it, and it adds some color to his walls--and if he likes it, that's what's really important!
Monday, January 24, 2011
I'm building a wall...
ok, not REALLY, but sort of! ;) I'm in the middle of putting together a gallery wall for my living room.
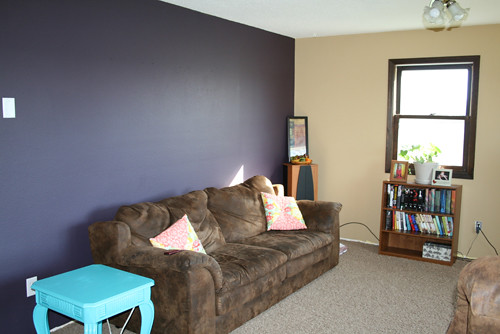
This was the wall before: (taken right after we painted a few months ago...purple is a Valspar color--sweet plum I think)
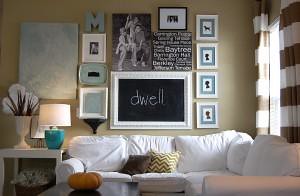
That blank wall has been staring at me everyday for months. I knew I wanted something fun and dramatic on it...but just wasn't sure what. Then one day, I came across this image on a blog:
(I have no idea what blog I found this on--if it is yours, please LMK and I'll give you credit!)
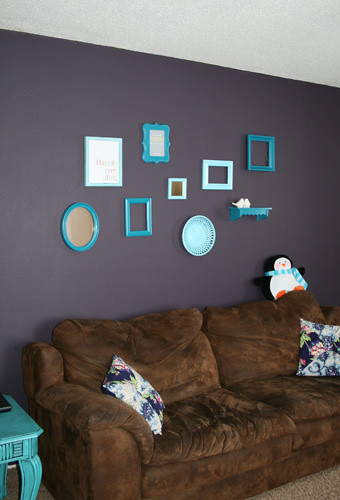
And BINGO! I knew what that huge wall needed! A gallery wall! It was brilliant! So I started collecting thrifted frames and interesting objects to hang. And then I spray painted them aqua or turqoise. I've had a pile of things sitting in the corner of my living room for a few weeks now, so yesterday I decided it was time to just start hanging them, even though I don't have quite enough yet.
I'm happy with how it's coming along though! And it really makes the purple wall pop now. I can't wait to find more things to hang! I definitely want a large letter P too somewhere in the mix. What do you think?
Now that I'm looking at it 'from afar' I think everything needs to be smushed closer together...it is such a big wall, I think I was trying to take up too much area with not enough...so I may be filling nail holes and painting this week, lol. Oh well, live and learn! I still love the idea, and think it works...just needs to be executed right.
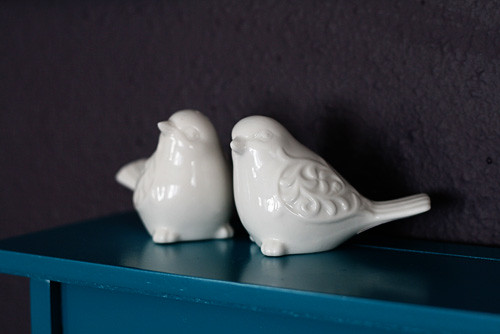
Oh, and I have to share these sweet little birdies that a friend sent me! They are actually salt and pepper shakers from Pier 1--they are $3 for the set! Aren't they sweet!? I love them so much! Thanks Jenn!
Happy Monday!
This was the wall before: (taken right after we painted a few months ago...purple is a Valspar color--sweet plum I think)
That blank wall has been staring at me everyday for months. I knew I wanted something fun and dramatic on it...but just wasn't sure what. Then one day, I came across this image on a blog:
(I have no idea what blog I found this on--if it is yours, please LMK and I'll give you credit!)
And BINGO! I knew what that huge wall needed! A gallery wall! It was brilliant! So I started collecting thrifted frames and interesting objects to hang. And then I spray painted them aqua or turqoise. I've had a pile of things sitting in the corner of my living room for a few weeks now, so yesterday I decided it was time to just start hanging them, even though I don't have quite enough yet.
I'm happy with how it's coming along though! And it really makes the purple wall pop now. I can't wait to find more things to hang! I definitely want a large letter P too somewhere in the mix. What do you think?
Now that I'm looking at it 'from afar' I think everything needs to be smushed closer together...it is such a big wall, I think I was trying to take up too much area with not enough...so I may be filling nail holes and painting this week, lol. Oh well, live and learn! I still love the idea, and think it works...just needs to be executed right.
Oh, and I have to share these sweet little birdies that a friend sent me! They are actually salt and pepper shakers from Pier 1--they are $3 for the set! Aren't they sweet!? I love them so much! Thanks Jenn!
Happy Monday!
Wednesday, January 19, 2011
Kitchen before and after; Part I
I'm calling this Part One as there is still work to be done! But all the 'hard' work is complete--what's left is just the decor...it's coming along slowly, but it's coming!
______________________________________________________________
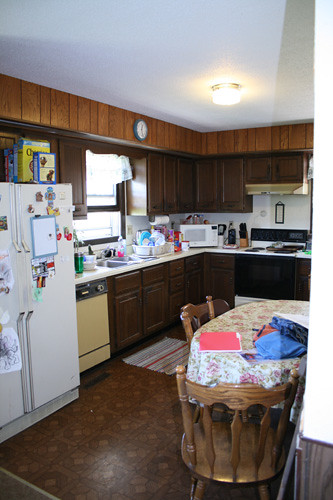
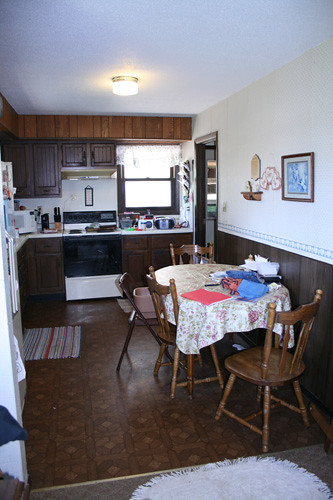
When we purchased our house this summer, to say it needed 'some work' was a bit of an understatement. We loved the house structurally, and fell in love with the yard (all 3 acres of it!). The kitchen was the biggest project we had to take on--along w/ a few small ones, and a bathroom redo--and all in 2 weeks time! We had sold our old house, and we had a 1 month window in between selling and buying--so we ended up renting an apartment...that was 30 miles away from the new house! We took possesion on July 30th, 2010, and moving weekend was scheduled for 3rd week in August. The kids were starting school, and we HAD to be out of the apartment by the end of August, so we had lots to do in a short amount of time! Dustin (hubby) took off 2 weeks from work, and we got busy. We drove 30 miles back and forth everyday, sometimes multiple times a day (the home improvement store was ALSO 30 miles away), and our 4 kids came along every day. It was greuling, but so worth it!
The biggest issue with the house was just the fact that it was so dirty! The previous couple had built the house and lived here for the past 30 years...and I think they lost the scrub brush 5 or so more years ago! The also had pets inside, and the smell inside would knock you over! We pretty much gutted the main floor--ripped out all appliances, trim, flooring, toilets, sinks, countertops; it all went.
So, kitchen specs:
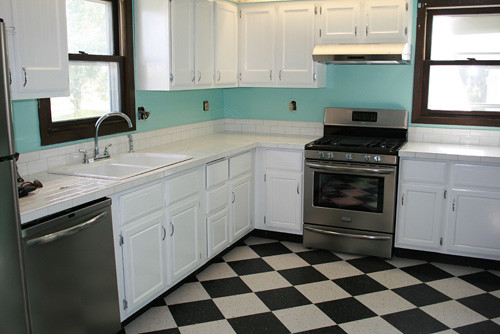
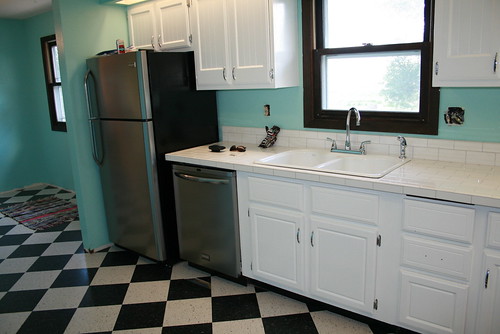
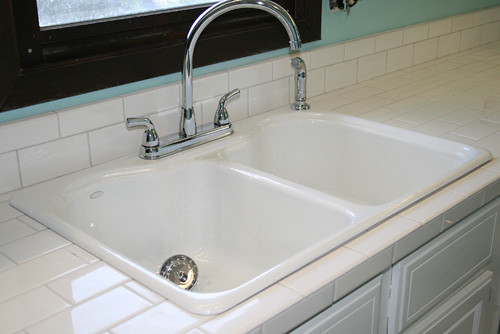
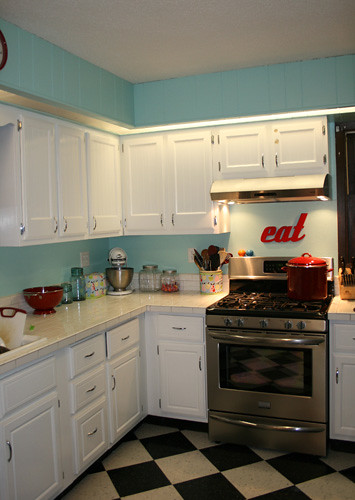
We (by we I totally mean my husband!) laid new VCT tile flooring--classic black and cool white by Armstrong. Dustin also put in a new tile countertop--using white subway tile--he did an absolutely amazing job. We got all new appliances (Easy Care Stainless Steel by Fridgidaire--LOVE--no fingerprints!), new HUGE porcelain enamel sink by Kohler, new faucets, and I spent a week repainting the dark wood cabinets white (Ultra White by Dutchboy). All of our work paid off BIG--I love my new kitchen (wall color is Aqua Glow by Valspar). The after pics were taken before we moved it, but you still can see the dramatic difference!
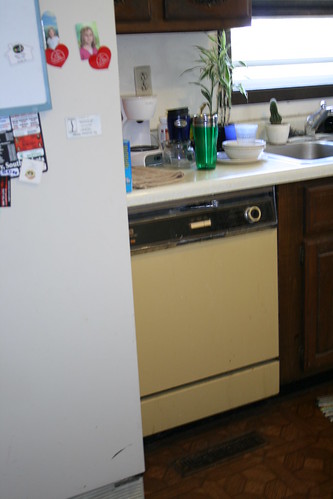
Before (pics were taken during one of our walkthroughs, so all the seller's stuff is still there--I never got anymore 'before' pics!)
Schnazzy dishwasher!
And after:
And a more recent pic, with our things moved in
It's still a work in progress as far as decorating goes, but it's getting better all the time! I still have a lot of blank walls, and hope to figure out soon what to hang!
Linking up to the Weekend Wrap Up at Tatortots and Jello
http://www.elements-interiors.net/2011/03/whassup-wednesday.html
http://thriftydecorchick.blogspot.com/2011/03/before-and-after-party-kitchen-nook.html
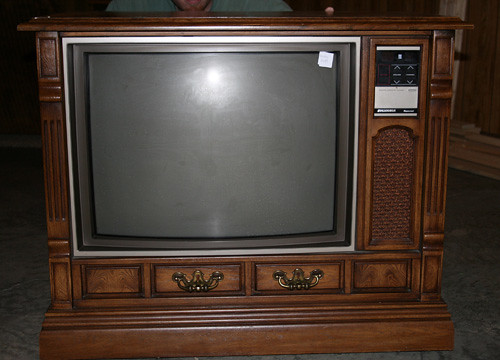
TV Console Redo
This is seriously one of my favorite projects EVER. It turned out so much better than I even imagined it would, and will be one of my favorite pieces of furniture for a very long time!
A few months ago, I stumbled upon an awesome little blog called "Infarrantly Creative" and came across a post where she took an old console TV headed for the dump, and turned it into this amazing console table! I was floored, and immedietly started looking for an old TV!
A couple months later, and with some big help from my husband, we finally had our TV! Even hubs was excited about this project--which was good, b/c I needed him for the dirty work! Gotta love a man who can work power tools (and someday I really need to learn to use them myself!).
So, here is what we started with: (We paid $5 for it!)
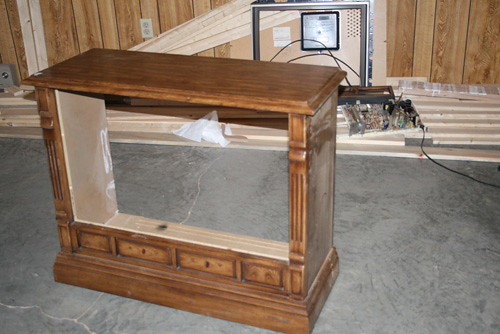
Next, hubby took out the TV:
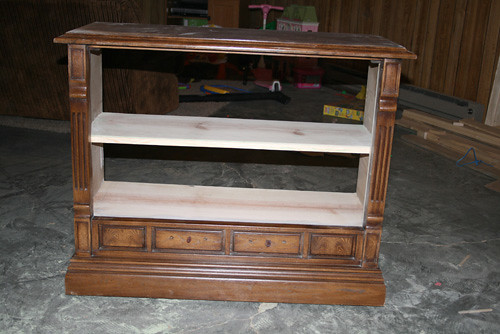
And then he added a false bottom and a couple shelves using a Kreg-Jig and some scrap wood.
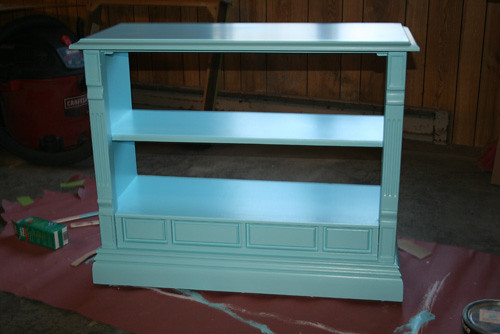
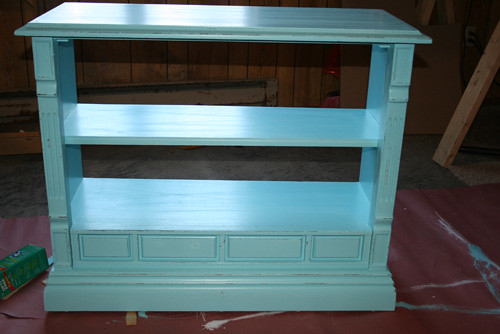
Then we sanded, primed and painted: (paint color is a Color Place color called Azule--and was leftover from my old kitchen, so again, free!)
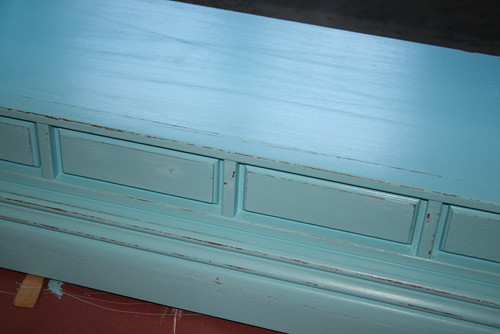
Then I grabbed some sandpaper and started distressing it:
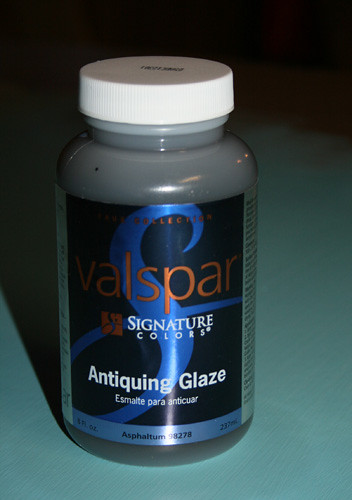
Then I grabbed my secret weapon....
Glaze! And turned awesome into awesome-er!
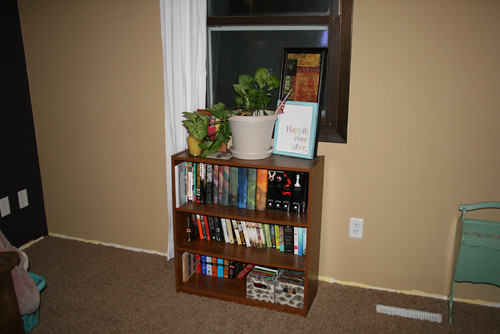
This was our old $20 walmart bookshelf:
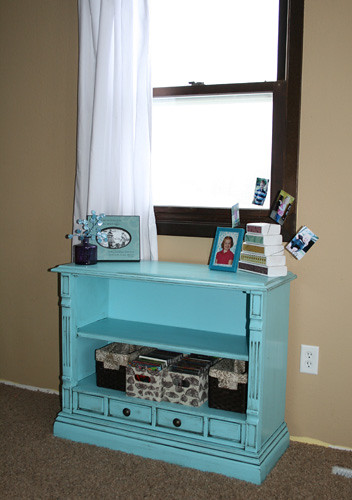
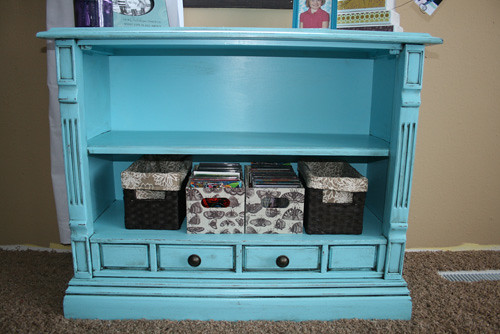
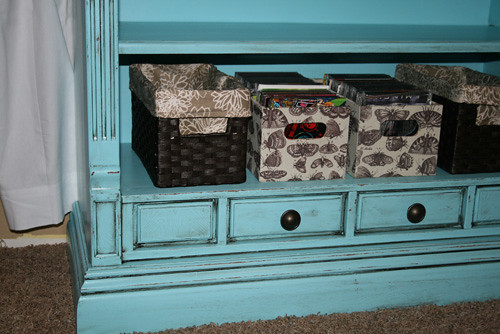
Doesn't this look so much better!! And the best part, it cost around $15--I spent $5 on a new piece of backer board, and "splurged" on new knobs that cost $4 a piece. And it looks like a million bucks!
Few more pics:
Don't you just love it!? I can't help but smile everytime I see it--it's the perfect touch to the living room!
Table runner
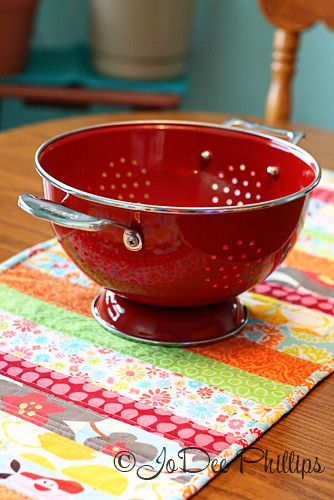
Instead of making the 2nd pair of curtains to go in my kitchen like I should have today, I spent it instead making a runner for my table. Awhile ago I purchased this awesome RED Cuisinart colander. I thought it would make a perfect centerpiece for my kitchen table...if only I had a cute runner to go underneath! ;)
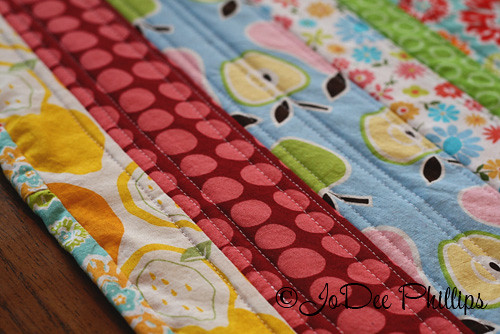
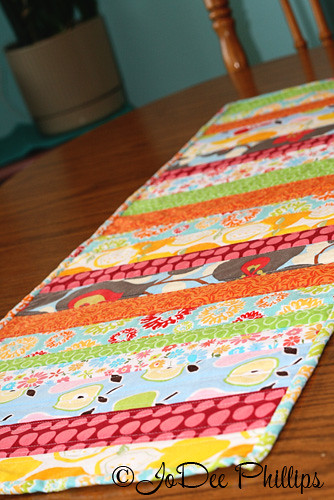
So, after a couple hours, I came out of my sewing room with this:
It's definitely bright and fun! Not sure if I 100% love it--the green and orange are a bit overpowering, but it's still cute! I would love to make a red and aqua one now to match the kitchen a bit more. It was soo easy to make too, and I am not a quilter! I bascially followed this tutorial, and it really went together very fast. Fabrics were just from my stash--I just pulled out a bunch of bright colors and went with it.
Detail shot:
And with the colander! Pretty huh? It needs a little something in the colander, I'm just not sure what yet--was thinking maybe some fake lemons? What do you think?
Jumping in!
Hello blogland! I'm diving right into this new blog. Anything below this post was exported from my original blog "Silly Piggy Monkey."
Quick intro--I'm JoDee--I have 4 adorable kiddos, and an awesome hubby who works super hard so that I can do the stay-at-home-mom thing, and spend my days 'making crap' as he calls it! :) I love sewing, but also enjoying other types of crafting as well. We recently bought a fixer-upper house, and my latest projects have been about beautifying my house on a budget, and finding my style. I hope to share this journey with all of you!
So getting right to it. Yesterday I started on curtains for the kitchen. Who knew sewing rectangles could be so challenging. I can whip out a 2 layer ruffled dress in no time flat, but sewing 2 pieces of fabric together almost broke me yesterday. Wow. I can assure you I will never become a professional curtain maker!
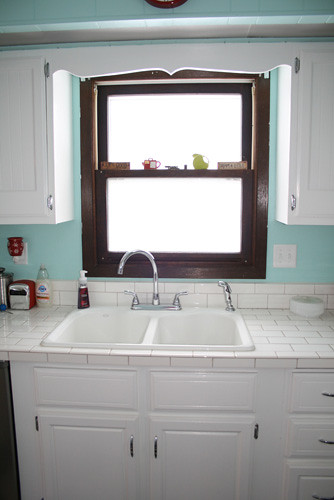
This was my window before--and yes, that brown trim is UGLY! Painting trim is on my list of projects--the whole house is covered in icky brown trim that is slowing becoming white)
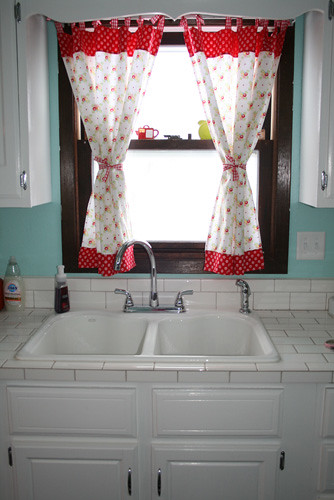
And afterwards...
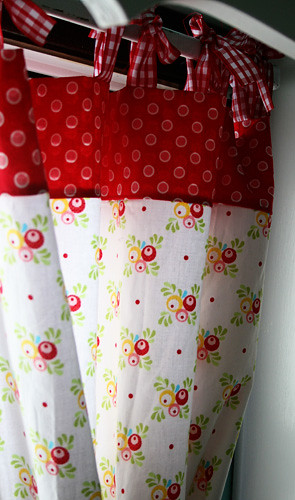
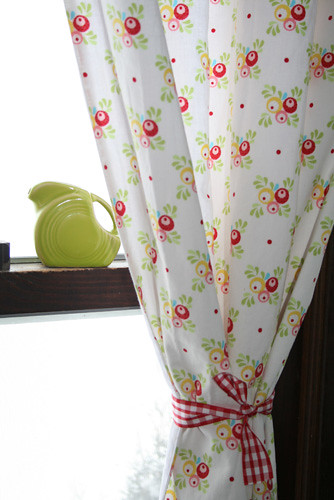
What a difference a bit of fabric makes! In case you were wondering, the tutorial for the curtains can be found here. I used the very same fabric from the tutorial, as it fit my kitchen perfectly! It's called Simply Sweet by Barbara Miller--and it's even cuter in person!
Here's a couple more detail shots:
(Don't you love my little mini Fiesta pitcher?! My mother in law got it for me for Christmas and I absolutely adore it!!)
I'll post some more pics of my kitchen in a later post--it's a pretty dramatic before and after, and I love to show it off--it's my favorite room in the house!
Subscribe to:
Posts (Atom)